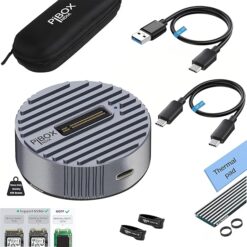
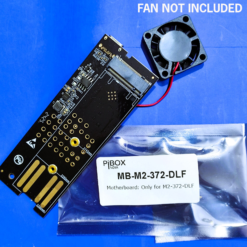
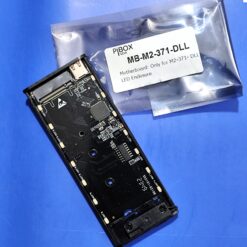
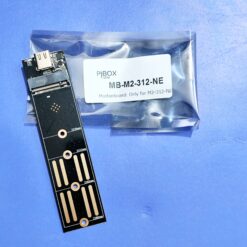
PIBOX India - Gen 3 Data SERIES
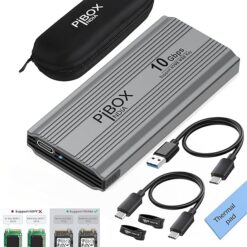
PiBOX India: M.2 SSD Enclosure Solutions
M.2 SSD Enclosure Technology
M.2 SSD enclosures are specialized external cases that transform internal M.2 SSDs into portable, high-speed storage devices. These compact solutions enable users to convert internal drives into versatile external storage with seamless connectivity.
Core Benefits of M.2 SSD Enclosures
- Instant portability for internal SSDs
- Maintain high-speed data transfer rates
- Support multiple SSD form factors
- Cost-effective storage expansion
PiBOX India Product Philosophy
At PiBOX India, we engineer M.2 enclosures with a singular focus: delivering exceptional performance, comprehensive compatibility, and true value without compromising quality.
Comprehensive Product Line
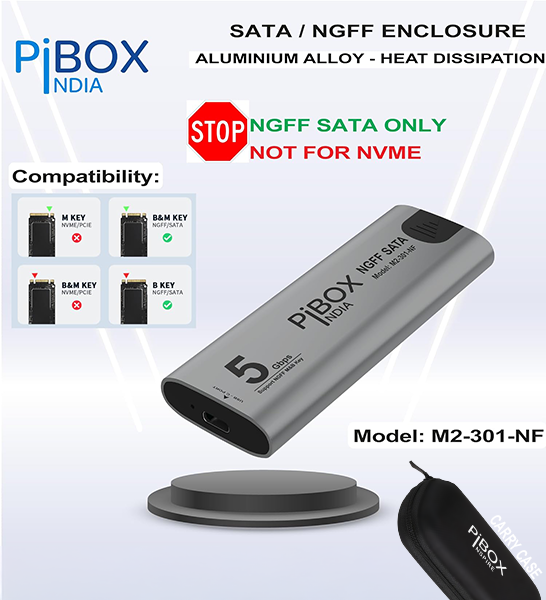
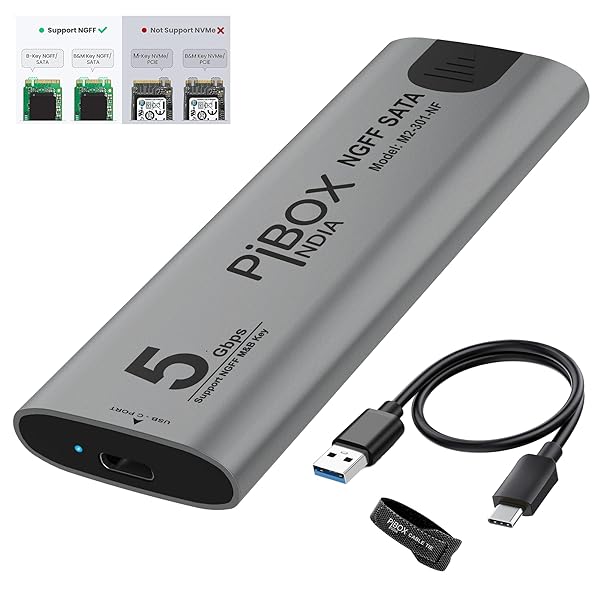
SATA M.2 SSD Enclosure
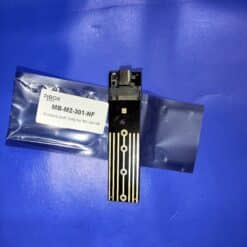
- Model: M2-301-NF
- Chipset: Realtek RTL9201R
- Ideal For: Traditional SATA III M.2 SSDs
- Compatibility: NGFF/SATA Specific
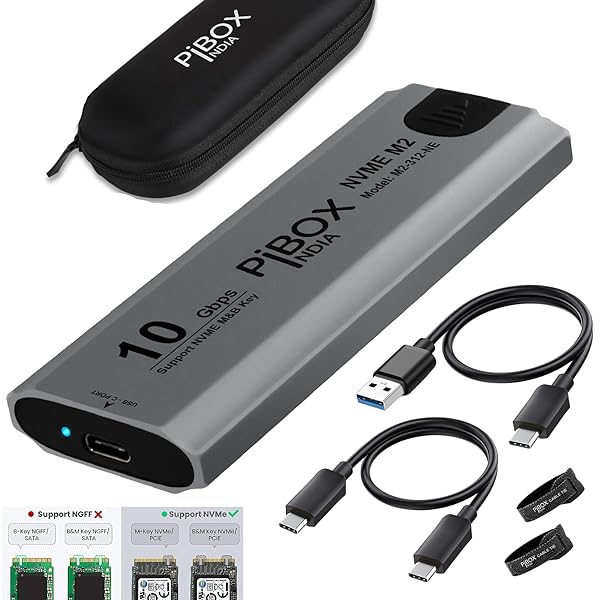
NVMe SSD External Enclosures
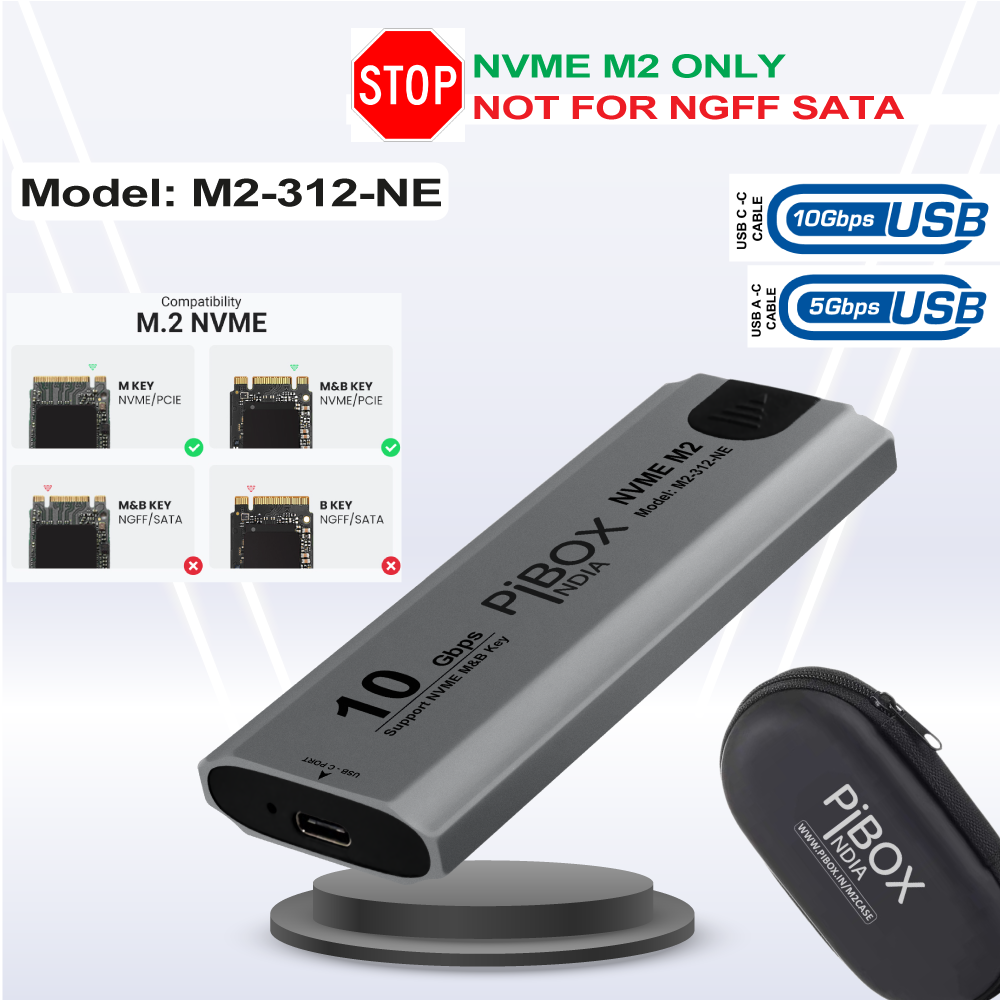
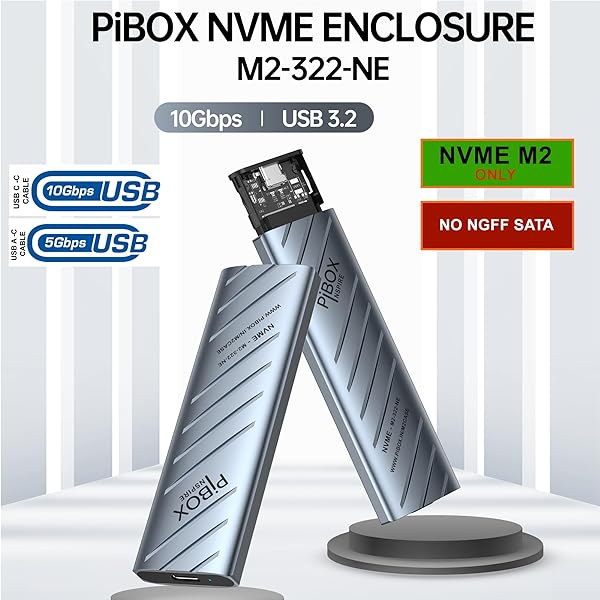
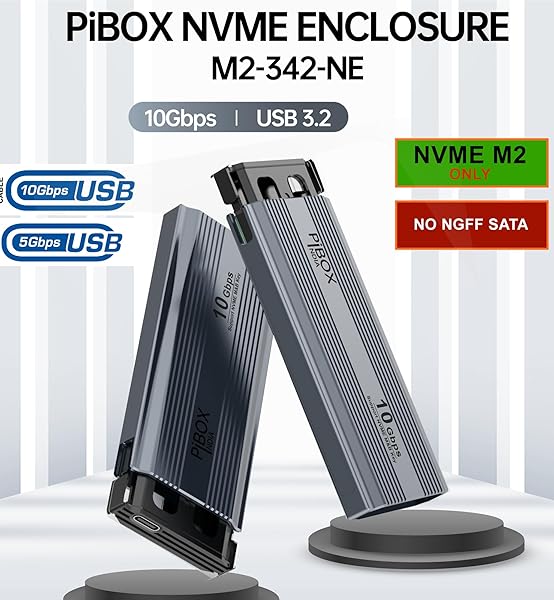
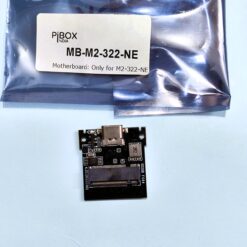
- Models: M2-312-NE, M2-322-NE
- Chipsets: Realtek RTL9210, JMICRON JM583
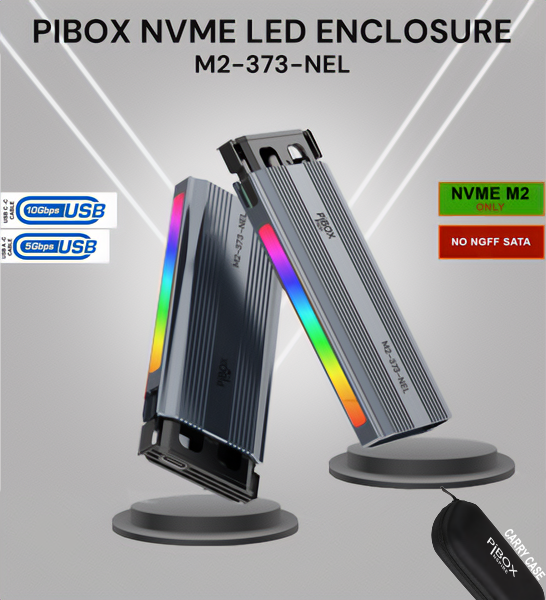
- Specialized For: High-Speed NVMe SSDs
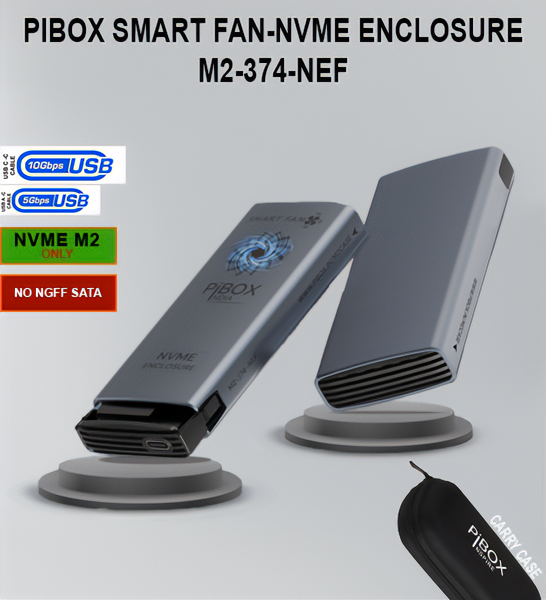
- Designed: Exclusively for NVMe Drives
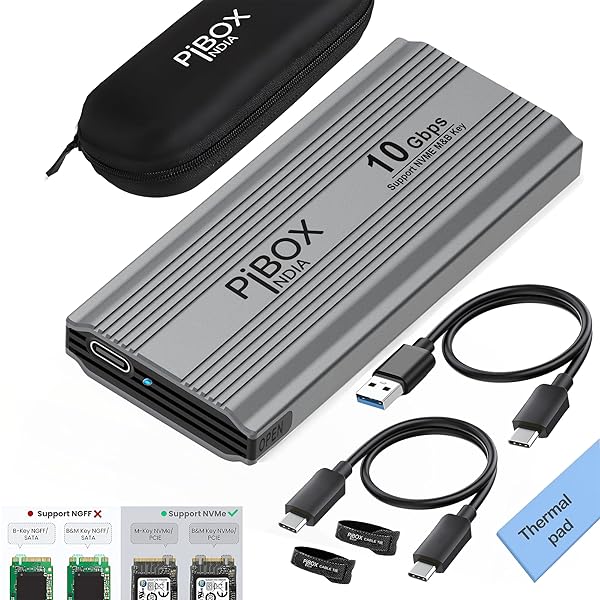
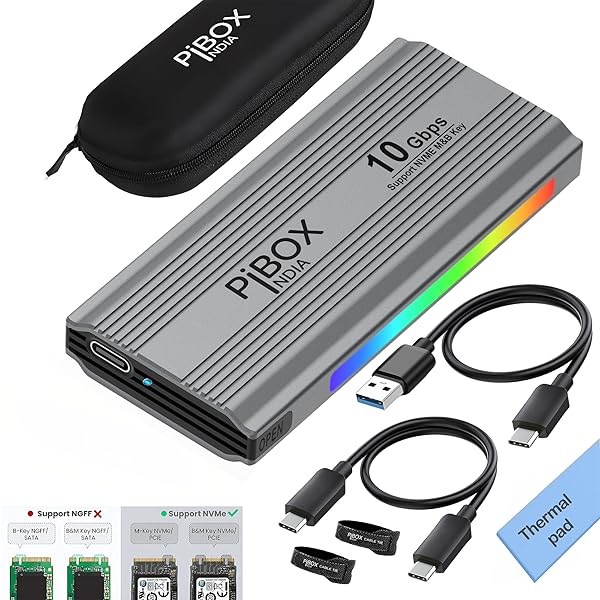
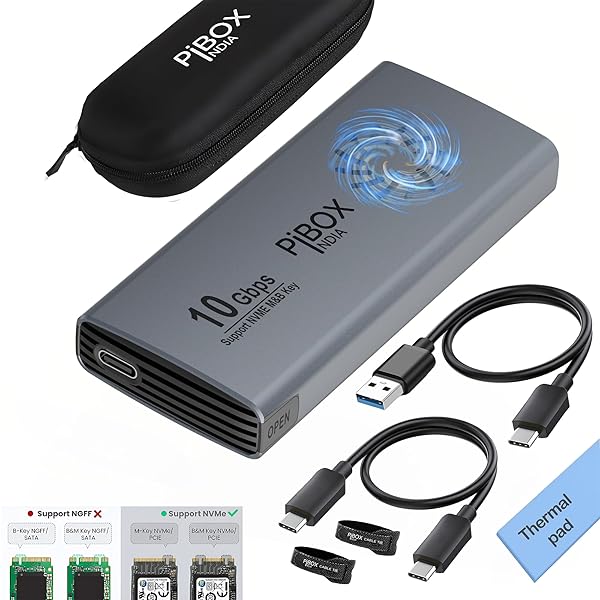
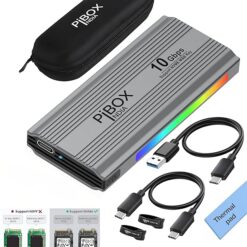
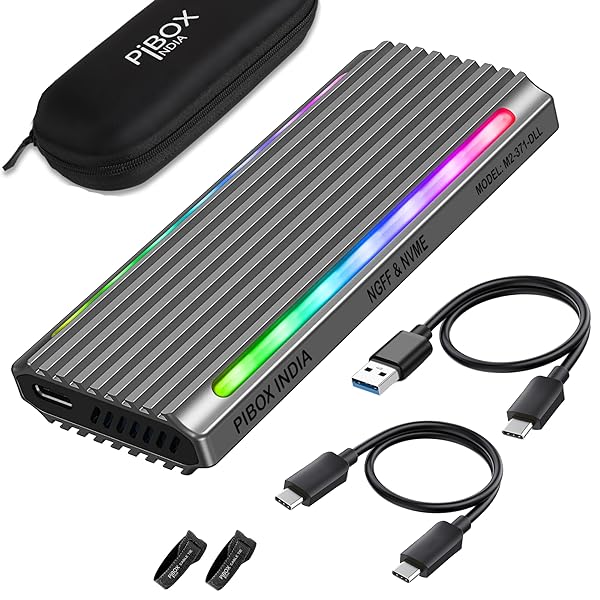
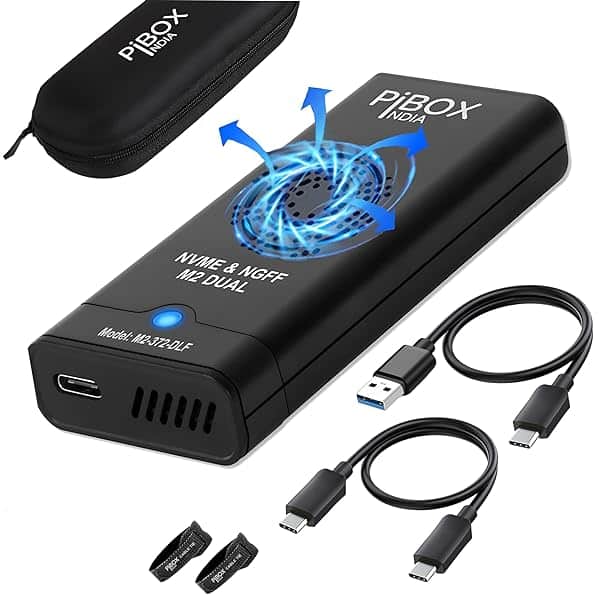
Dual Protocol Innovative Series
- Models:
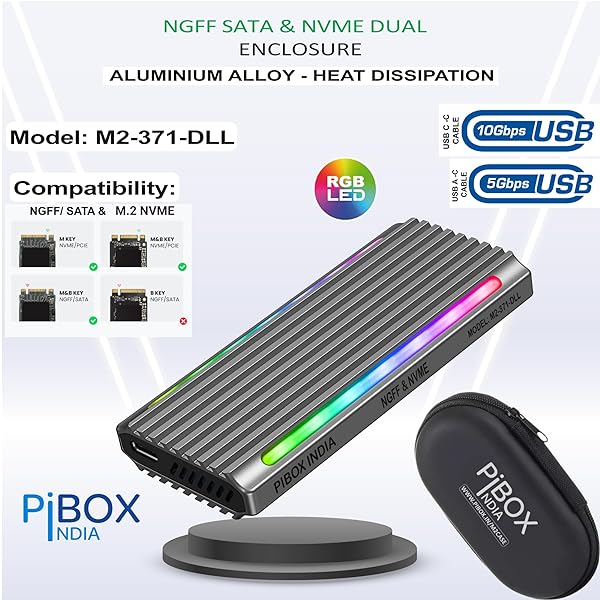
- M2-371-DLL (Gaming Series)
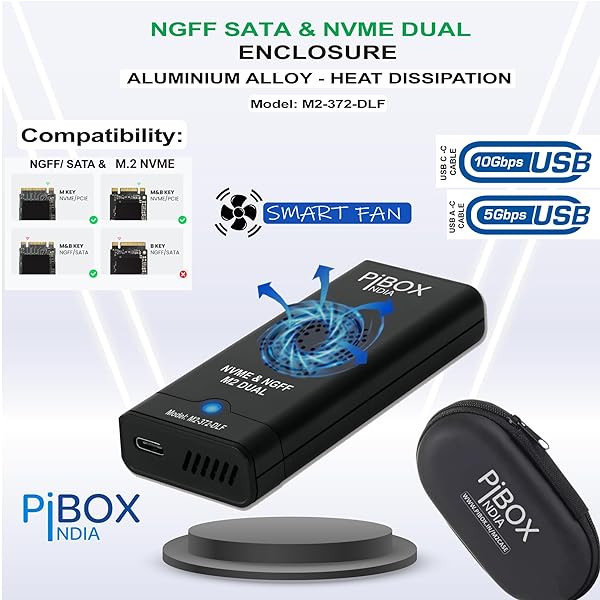
- M2-372-DLF (Smart Fan Series)
- Compatibility: Supports NVMe and NGFF SSDs
- Features: Integrated cooling, flexible protocol support
- M2-333-DL (FIN-Design)
Technical Specifications
Compatibility Information
When selecting an enclosure, it’s essential to understand the SSD type you are using. PiBOX enclosures are compatible with a wide range of M.2 SSD types:
- SATA M.2 SSDs (NGFF) require SATA-only enclosures.
- PCIe NVMe M.2 SSDs (M-key) require PCIe NVMe enclosures to take full advantage of their speed.
- Dual-protocol enclosures like those offered by PiBOX support both SATA and PCIe NVMe SSDs, providing flexibility and ease of use.
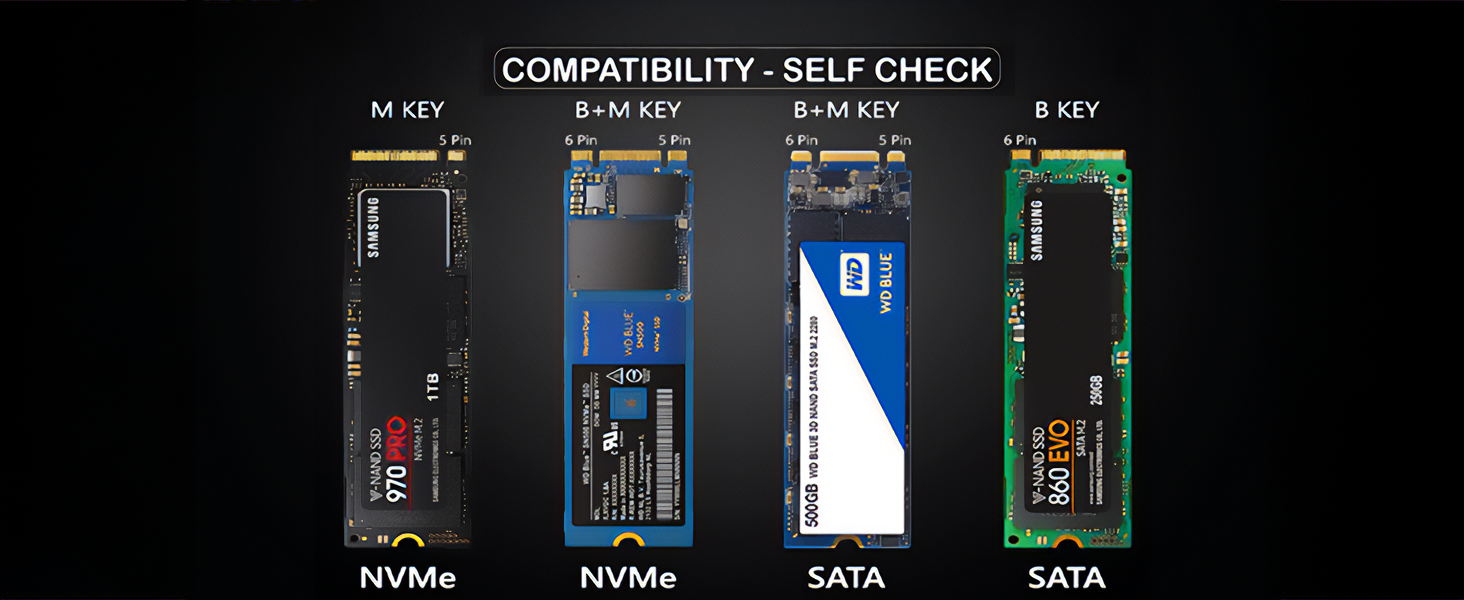
PiBOX offers a Self-Checker tool on our website to help you easily determine which M.2 SSD type you have and identify the most compatible enclosure model.
Installation and Setup
Quick Setup Process
- Select appropriate enclosure for your SSD
- Insert SSD into designated slot
- Connect via USB-C
- Instant plug-and-play access
Support and Resources
- Compatibility checker tool
- Firmware update support
- TRIM and SMART functionality
- Comprehensive troubleshooting guide
- Expert customer assistance
Strategic Search Terms
- M.2 SSD enclosure
- NVMe external enclosure
- Portable SSD housing
- USB M.2 storage solution
- High-speed external drive
- PiBOX India storage solutions
Why Choose PiBOX India
- Innovative design
- Competitive pricing
- Robust build quality
- Comprehensive compatibility
- Dedicated customer support
Elevate Your Storage Experience with PiBOX India
Self Checker - Must Try!
We understand the variety of M.2 SSD variants can be overwhelming. Our effort is to simplify the process, making it easy to determine the right enclosure for your needs.
M2 ENCLOSURE SERIES
Compatibility & Product SELCTOR
Troubleshooting
Step 1: Check the Physical Connection
- Make sure your disk is properly plugged in:
- For internal disks: Check both the power cable and the data cable.
- For external disks: Ensure the USB cable is securely connected.
- If possible, try a different connection:
- Internal disks: Use a different SATA port on your motherboard.
- External disks: Try a different USB port on your computer.
Step 2: Look in Disk Management
- Open Disk Management:
- Press the Windows key + X
- Click on “Disk Management” in the menu that appears
- In the Disk Management window, look for your disk:
- It might appear as “Unallocated” or “Not Initialized”
- If you see it here but not in My Computer, continue to the next steps
Step 3: Initialize the Disk (for brand new disks)
- If your disk is new and shows as “Not Initialized”:
- Right-click on the disk name (usually on the left side)
- Select “Initialize Disk”
- Choose a partition style:
- For most modern computers, select GPT
- For older systems, choose MBR
Step 4: Create a Partition and Format the Disk
- Right-click on the unallocated space in your disk
- Select “New Simple Volume”
- Follow the wizard that appears:
- Choose how big you want the partition to be
- Assign a drive letter (like D: or E:)
- Format the partition:
- Choose NTFS as the file system
- Give your disk a name (like “My New Drive”)
Step 5: Assign or Change the Drive Letter
- If your disk doesn’t have a letter:
- Right-click on the partition
- Choose “Change Drive Letter and Paths”
- Click “Add” or “Change” and select an available letter
Step 6: Update the Disk Driver
- Open Device Manager:
- Right-click on the Start button
- Select “Device Manager”
- Find and expand “Disk drives”
- Right-click on your disk
- Select “Update driver”
- Choose “Search automatically for updated driver software”
Step 7: Check for Disk Errors
- Open Command Prompt as an administrator:
- Type “cmd” in the Windows search bar
- Right-click on “Command Prompt” and select “Run as administrator”
- In the Command Prompt, type: chkdsk X: /f (Replace X with your drive letter)
- Press Enter and let the process complete
Step 8: Check BIOS/UEFI Settings
- Restart your computer
- As it’s starting up, press the key to enter BIOS (often F2, F12, or Delete)
- Look for disk-related settings:
- Ensure SATA mode is set to AHCI
- Check if your disk is detected in the BIOS
If you’ve tried all these steps and your disk still isn’t showing up, there might be a hardware problem. In this case, you might need to:
- Try the disk in another computer to see if it works there
- Consider getting help from a computer repair professional
- Think about replacing the disk if it’s faulty
FAQ
PiBOX enclosures support SATA III M.2 SSDs, PCIe® Gen3 NVME, and PCIe® Gen4 NVME, depending on the specific model.
M.2 is the physical form factor for SSDs, while SATA and PCIe refer to the storage interfaces. The primary differences are performance and protocol:
- M.2 SATA SSDs use the same controller as typical 2.5-inch SATA SSDs, which limits their speed.
- M.2 PCIe SSDs utilize a controller specifically designed to support the PCIe protocol, offering significantly faster data transfer rates. The M.2 specification was designed to accommodate both SATA and PCIe interfaces for SSDs, enabling flexibility in usage.
Installing the M.2 NVMe Drive and Thermal Pad
-
Prepare the Area: Start by cleaning the surface where the thermal pad will be applied.
-
Insert the M.2 NVMe Drive: Carefully insert the M.2 NVMe drive into the enclosure slot, securing it firmly according to the enclosure instructions.
-
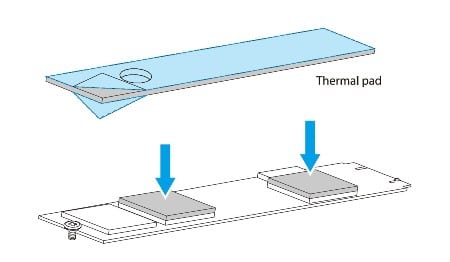
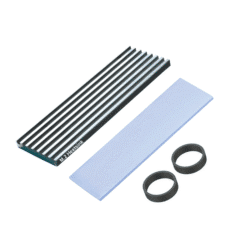
Prepare the Thermal Pad: Remove the protective films from both sides of the thermal pad as shown in the image below.
-
Position the Thermal Pad: Place the thermal pad securely on the designated area above the NVMe SSD.
-
Reinsert the M.2 NVMe Drive: Ensure that the M.2 NVMe drive fits snugly back into the enclosure slot.
Note: It may be a tight fit when closing the enclosure with the thermal pad in place. This design enhances contact points for improved heat dissipation. The thermal pad is functional, so proper contact with the metal is essential for effective performance.
For the larger 2 mm thermal pads, you might need to trim additional material based on the thickness of your drive, as different drives come in various thicknesses.
Summary: The thermal pad is a functional component, not just a cosmetic one. The tighter the fit, the better the heat transfer will be.
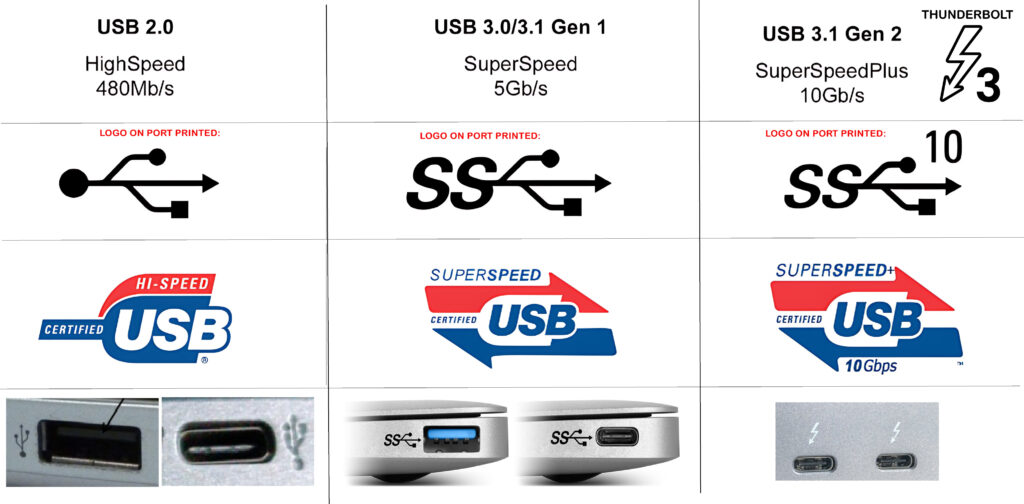
Critical: Use Thunderbolt 3.0 Port for maximum speed of 10 Gbps. If the USB Port is SS capable only then we will only get USB 3.1 speed of 5 Gbps.
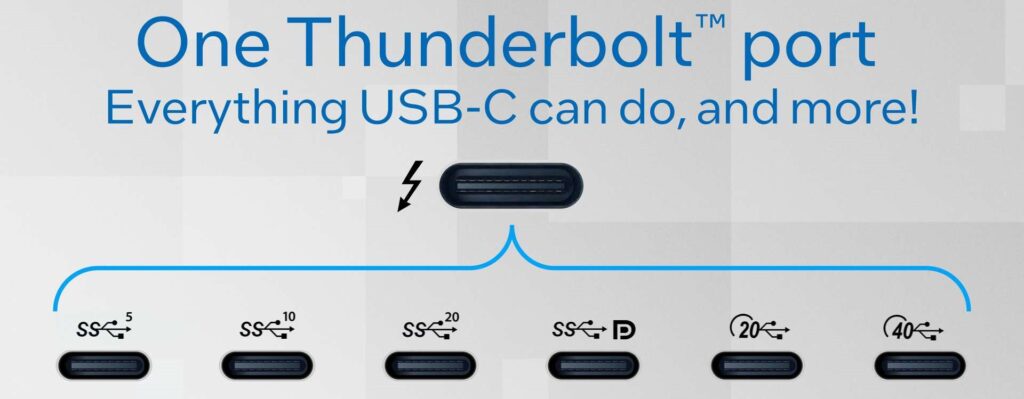
Below are different capabilities of a Thunerbolt 4.0 Port. See your laptop to understand if your laptop supports Thunderbolt 3.0 or 4.0
Speeds can vary depending on the specific NVMe model used and the host device, but typically, you can expect speeds up to 10 Gbps or more with PCIe Gen3 and Gen4 SSDs.
Critical: Use Thunderbolt 3.0 Port for maximum speed. If the USB Port is SS capable only then we will only get USB 3.1 speed of 5 Gbps.
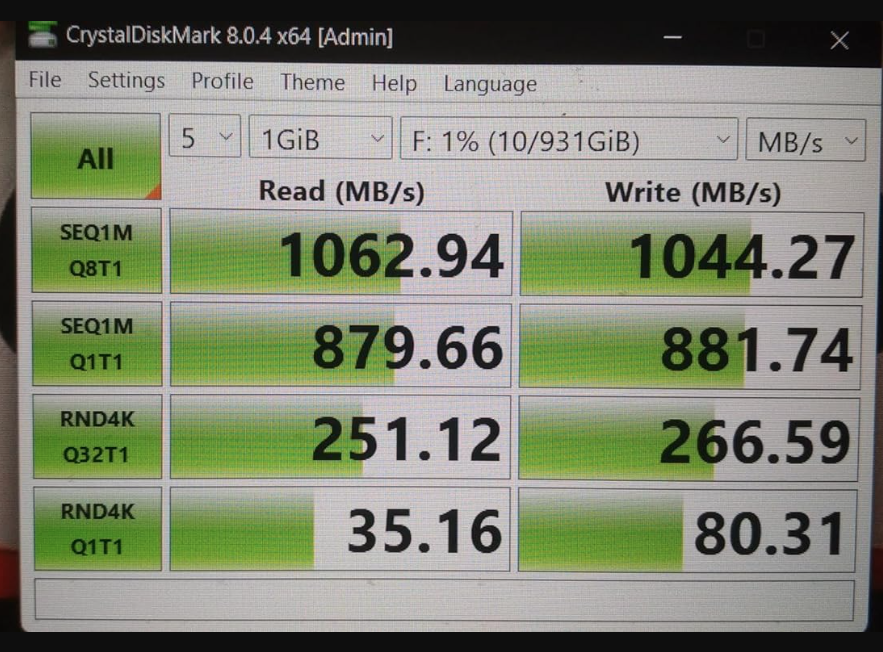
Speedtest with C – C Cable with a Thunderbolt 3.0 Port:
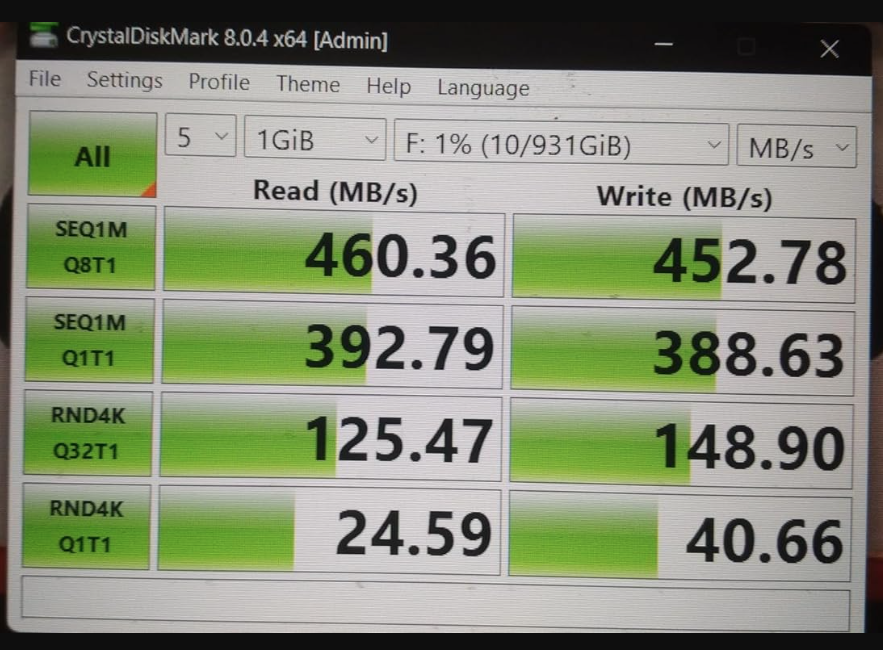
Speedtest with C – A Cable with a SuperSpeed USB 3.0 Port:
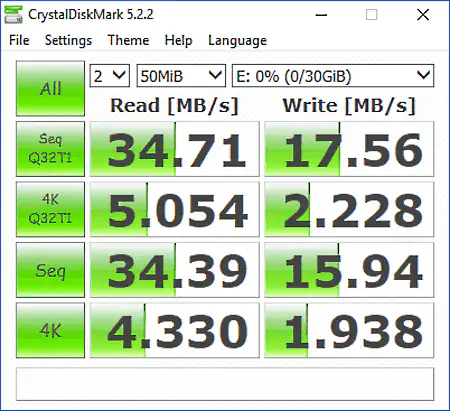
Speedtest with USB 2.0 Port:
[Most android phones has USB 2.0 unless they are flagship series. (Check willcwork page to know more)
Speeds are approx 20 to 30 Mbps if connected to a usb 2.0 port
Steps to Improve Your Disk Speed
-
Identify Disk Type: Check if your disk is TLC (Triple-Level Cell) or QLC (Quad-Level Cell, DRAMless). Performance varies significantly between these types, especially when used externally. (Search online for more information.)
-
Disable Write Cache:
- Go to Device Manager → Disk Drives.
- Right-click on the NVMe drive and select Properties.
- Under Policies, uncheck ‘Enable write caching on the device’.
- Note: Disabling write cache is particularly beneficial for DRAMless NVMe disks, enhancing write performance. This step isn’t necessary for TLC disks, which have sufficient caching.
-
Use Back Motherboard Port: For desktop PCs, connect the NVMe drive to the motherboard’s backside port. These ports usually have dedicated lanes and minimize bottlenecks compared to front-side ports.
-
Manage Thermal Throttling:
- Cooling Solutions: Use a cooling fan or heatsink to prevent overheating and thermal throttling.
- USB-C Cable: If throttling persists, use a USB-C cable rated for 5Gbps to help regulate speed and prevent overheating.
-
Enable TRIM Support: Activating TRIM can enhance write speeds by allowing the drive to efficiently manage and reclaim unused blocks. (Refer to additional steps for details.)
-
Optimize System Settings: Adjust system settings by disabling power-saving modes, enabling AHCI or NVMe drivers, and ensuring adequate resources for the storage controller to maximize performance.
Yes, a PCIe Gen4 NVMe SSD will work in a PiBOX India M.2 enclosure that supports PCIe Gen3 NVMe, but it will operate at the enclosure’s maximum PCIe Gen3 speed capabilities. The SSD will automatically adjust its performance to match the enclosure’s PCIe Gen3 specification, ensuring compatibility while not reaching its full Gen4 speed potential.
Yes, you can clone your internal SSD to an NVMe SSD in your PiBOX India enclosure using cloning software. Just make sure to:
- Connect the enclosure to your computer first
- Use any cloning software that supports USB storage devices
If your SSD came with its own cloning software (like Samsung Data Migration or Crucial’s Acronis True Image), you can use that too.
Cloning Software Compatibility
| Cloning Software | Compatible with USBC-NVME (Realtek chipset) | Compatible with USBC-NVME (JMicron chipset) |
|---|---|---|
| Macrium Reflect | Yes | Yes |
| Acronis True Image (Retail) | Yes | Yes |
| Clonezilla | Yes | Yes |
| Samsung Data Migration Software | Yes – Only for compatible Samsung SSDs | No |
| Acronis True Image (Crucial) | No | No |
Firmware updates for SSDs in the PiBOX India enclosure can be challenging because:
- Most SSD manufacturer’s firmware tools require a direct PCIe connection
- These tools typically don’t support SSDs connected via USB
- For firmware updates, you may need to install the SSD directly into your motherboard
While the PiBOX enclosure offers excellent compatibility for regular use, firmware updates usually require connecting the SSD internally to your system rather than through the USB connection of the enclosure.
Yes, the PiBOX India M.2 enclosure supports TRIM with compatible operating systems. Here’s how to use it on different systems:
For Windows 10:
- TRIM works with USB-connected SSDs that support UASP and use NTFS/ReFS file systems
- To check/enable TRIM:
- Open PowerShell as Administrator
- Check status:
fsutil behavior query DisableDeleteNotify - Enable if needed:
fsutil behavior set DisableDeleteNotify 0
- To run TRIM manually:
- Search for “Defragment and Optimize Drives”
- Select your USB SSD and click “Optimize”
- Or use PowerShell command:
defrag /o X:(replace X with your drive letter)
For macOS:
- Open Terminal and enable TRIM:
- Run:
sudo trimforce --enable - Enter your password when prompted
- Type ‘Y’ to confirm
- Run:
- To verify TRIM is running:
- Use Terminal command:
log show --start $(date +%F) | grep -i spaceman_trim_free_blocks
- Use Terminal command:
For Linux: TRIM is supported with kernel 2.6.28 and later, with specific behavior depending on your distribution.
Note: Some older USB 3.0 controllers may not support TRIM properly.
Here’s how to format your drive on different operating systems:
Windows 10:
- Connect your PiBOX enclosure to your computer
- Format using Disk Management:
- Right-click Start menu → Select “Disk Management”
- For new drives: Initialize when prompted (Choose GPT for drives >2TB)
- Right-click “Unallocated space” → “New Simple Volume”
- Follow the wizard:
- Choose drive letter
- Select file system (NTFS for Windows-only, exFAT for multi-OS compatibility)
- Add volume label (drive name)
- Keep “Quick Format” checked
- Click Finish
macOS:
- Connect your PiBOX enclosure
- When prompted, click “Initialize” or:
- Go → Utilities → Disk Utility
- Select the drive in left column
- Click “Erase”
- Name the drive and choose format
- Click “Erase” to complete
General Tips:
- Always backup data before formatting
- For cross-platform compatibility, use exFAT
- For Windows-only use, NTFS provides better performance and features
- Make sure you select the correct drive before formatting
- The process usually takes a few minutes depending on drive size
M.2 SSDs come in three key formats, each with different capabilities:
- B-key:
- Supports SATA and/or PCIe protocols
- Limited to PCIe x2 speeds
- Look for notch position that matches your drive
- M-key:
- Supports SATA and/or PCIe protocols
- Capable of PCIe x4 speeds (fastest option)
- Most common for modern NVMe drives
- B+M-key:
- Supports SATA and/or PCIe protocols
- Limited to PCIe x2 speeds
- Compatible with both B and M-key slots
- Often found on SATA M.2 drives
Before purchasing an M.2 drive for your PiBOX enclosure, check the key type to ensure compatibility with your intended use case and desired performance level.
MAC OS:
Yes! Our USBC-NVME enclosure does support SMART data.
Access to SMART data is software dependent, we have tested our enclosures with smartmontools, a free, cross platform SMART reading and monitoring utility. The command line utility smartctl is the primary method for accessing the SMART data.
JMicron Units:
For our original JMicron enclosures the SMART data can be read using the “-d sntjmicron” argument at the command line, for example:
smartctl -a -d sntjmicron /dev/sdb
Realtek Chipset units:
Our USBC-NVME enclosures with Realtek RTL9210 chipset use a similar “-d sntrealtek” argument, however this will be automatically detected in future version of smartmontools.
smartctl -a -d sntrealtek /dev/sdb
[Refer chipset model on the main page version to know more]Windows:
Modern hard drives and solid state drives include support for Self-Monitoring, Analysis, and Reporting Technology or SMART. SMART data can show signs of drive failure or wear before data loss occurs and can be used to monitor the health of the drive including the temperature sensors in the drive itself.
From the Crystal Disk Info Graphical Utility
Crystal Disk Info can be downloaded from here, this is a 3rd party utility for viewing a drive’s SMART data in windows. This can be run without installation by downloading and extracting the ZIP file, or installed like many other applications.
After extracting the zip file, right-click on “DiskInfo64.exe” and select “Run as Administrator” to start the application with Administrative permissions required to read the SMART data from the drive.
From the Command Line with smartctl
The smartctl command is provided in the smartmontools suite. This can be downloaded and installed for Windows or Linux.
Installation and Running
- After downloading the smartmontools-7.2-1.win32-setup.exe, right-click on the file and select “Run as Administrator” to start the installation. Follow the on screen steps to install smartmontools.
- Open a terminal, right-click on the start menu and select “Windows PowerShell (Admin)” from the pop-up menu
- Type in `smartctl –scan` to list the available drives
- To output all of the drive’s SMART data, type in `smartctl –all /dev/sdn` where /dev/sdn is the first column from the scan output for the drive to be read
- Optionally, output this to a file the desktop using the following: `smartctl –all /dev/sdn > $env:USERPROFILEDesktopsmartdata.txt
If you receive an error “Open failed, Error=5” most likely the Windows PowerShell was not run as Administrator.
A: No, our enclosures are not compatible with SSDs that have integrated heatsinks as you cannot close the lid.
- Integrated heatsinks increase the SSD’s height, preventing the enclosure from closing properly.
- This applies to all our enclosure models.
- You can still connect these SSDs to the PCB for data transfers if needed.
Key point: Our enclosures are designed for standard SSDs without integrated heatsinks.
Need more details? Just ask support via whatsapp
Q: What is a PiBOX India M.2 Enclosure?
A: A USB storage solution that converts your M.2 NVMe SSD into a portable external drive.
Q: What drives are compatible?
A:
- Compatible with standard M.2 NVMe SSDs
- Dual protocol models support both NVMe and NGFF
- Check key type compatibility (M-key, B-key, B+M-key)
- NGFF B-Key only works with NGFF single protocol enclosures
Q: What speeds can I expect?
A:
- Thunderbolt Port: 900-1000 MB/s (8-9 Gbps)
- USB-C SuperSpeed: ~450 MB/s (4-5 Gbps)
- Actual speed depends on your USB interface
Q: How do I install an SSD?
A: Installation is tool-free – just open the enclosure, align the SSD with the connector, and secure it. Check your specific model’s manual for details.
Q: Do I need special drivers?
A: No, PiBOX enclosures are plug-and-play on supported operating systems. However, checking for firmware updates is recommended.
Q: Can I use it with gaming consoles?
A:Compatibility depends on your console’s external storage support. Check your device specifications first.
Q: Can I boot from it?
A: Yes, possible if your system’s BIOS/UEFI supports booting from external USB drives. Configuration may be required.
Note: Performance may vary based on your system specifications and connection type.
Q: How hot should my PiBOX enclosure get during normal use?
A: Normal operating temperature is 30-45°C under load. The aluminum case provides passive cooling. If temperatures seem high, consider:
- Reducing workload intensity
- Ensuring good airflow around the enclosure
- Using monitoring tools to track temperature
- Avoiding stacking with other devices
Q: Will this drain my laptop battery quickly?
A: No, the enclosure is power-efficient:
- Typical consumption: 3-5W
- Powered directly through USB – no external power needed
- Minimal impact on laptop battery life
- Safe to use with most USB 3.0/3.1 laptop ports
Q: How should I transport and store the enclosure?
A: The enclosure is durable but needs basic care:
- Use a protective case for travel
- Avoid extreme temperatures
- Keep away from moisture
- Safe for daily transport in laptop bags
- Store in cool, dry place when not in use
Q: What’s the maximum drive capacity I can use?
A: The enclosure is future-proof:
- Currently tested up to 4TB
- Compatible with larger drives as they become available
- No theoretical capacity limit
- Check specification sheet for guaranteed compatibility
Q: How does the enclosure handle sleep/wake cycles?
A: The enclosure integrates with system power management:
- Syncs with system sleep/wake states
- LED indicates drive activity
- Safe disconnect when LED is inactive
- Auto-recovery after system sleep
Q: Is this suitable for professional video editing?
A: Yes, with proper setup:
- Reliable for content creation workflows
- Handles continuous read/write operations
- Suitable for large file transfers
- Recommended for mobile workstations
- Regular backups advised for professional work
Q: What regular maintenance is required?
A: Minimal maintenance needed:
- Keep exterior clean and dust-free
- No internal maintenance required
- Monitor performance using diagnostic tools
- Expected lifespan: 3-5 years minimum
Q: What should I check if transfer speeds are slow?
A: Follow these steps:
- Verify USB port type (3.0/3.1/3.2)
- Check cable quality and connection
- Confirm UASP is enabled
- Test with different USB ports
- Update system drivers if needed
Note: For specific technical issues or warranty claims, contact PiBOX India support.
