
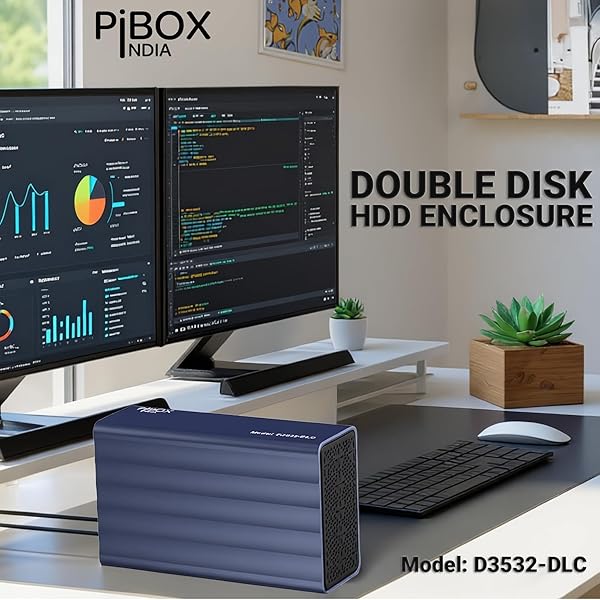
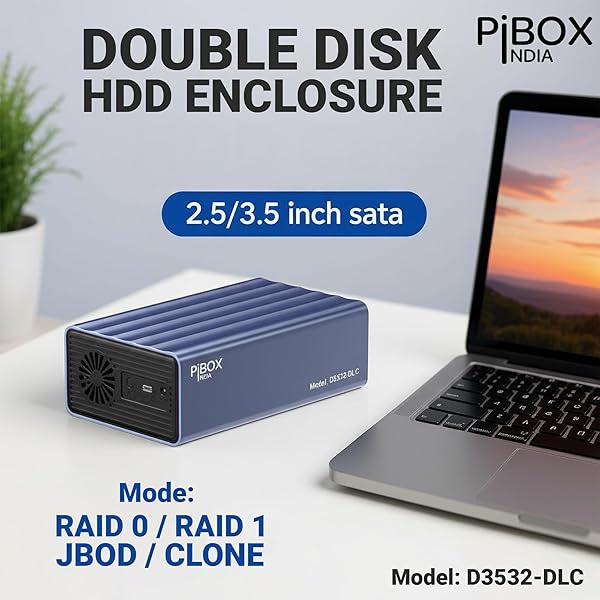


PiBOX India Dual 2 Bay 3.5/2.5 Inch SATA HDD SSD Aluminium Enclosure Dock – External RAID 0/1/JBOD/CLONE Storage with USB 3.1 Type-C, 6Gbps UASP, 56TB Capacity, Cooling Fan- REALTEK CHIPSET


₹2,287.29 Excludes GST
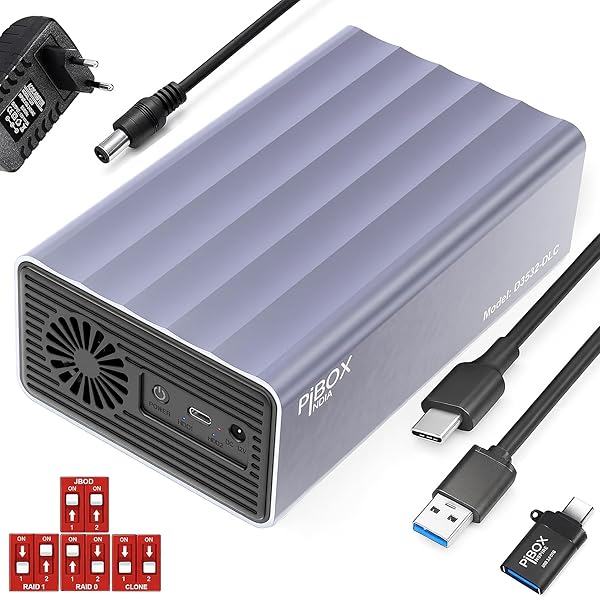
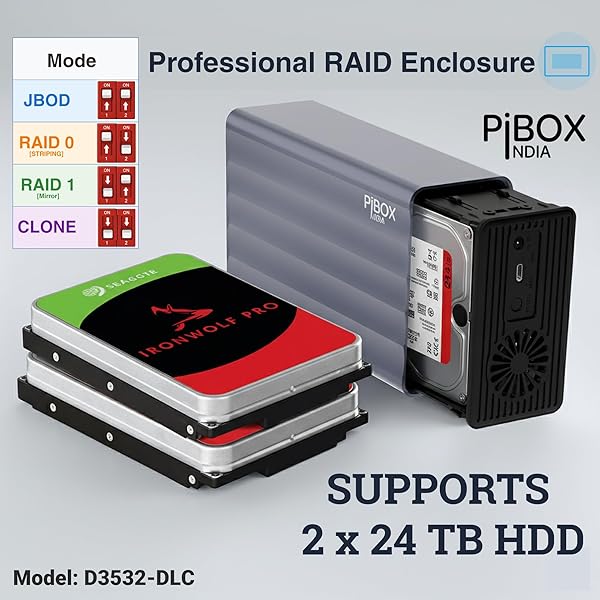
Transform your 3.5″ and 2.5″ SATA drives into a professional storage solution with the PiBOX India D3532-DLC. This dual-bay RAID enclosure powered by genuine REALTEK RTL9201RDP chipset delivers 6Gbps USB 3.1 speeds with massive 56TB capacity (2×28TB). Features 4 intelligent RAID modes (JBOD/RAID 0/RAID 1/CLONE) with hardware switching for instant configuration.
⚡ RAID Modes: JBOD • RAID 0 (Performance) • RAID 1 (Mirror) • CLONE (Backup)
💾 Compatibility: 3.5″ & 2.5″ SATA HDDs/SSDs • Up to 56TB total
🛠️ Complete Kit: USB-C cable • Power adapter • Manual • Tool-free installation
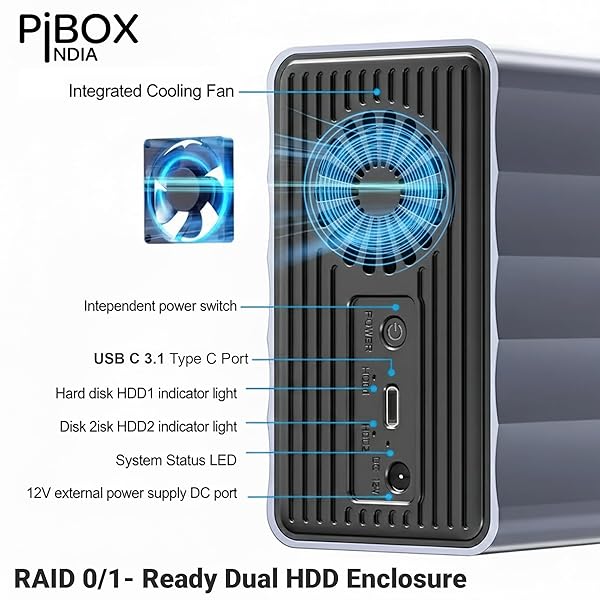
✅ Premium 325g+ aluminum construction with cooling fan for 24/7 operation
💾 56TB CAPACITY
❄️ ACTIVE COOLING
🔧 TOOL-FREE
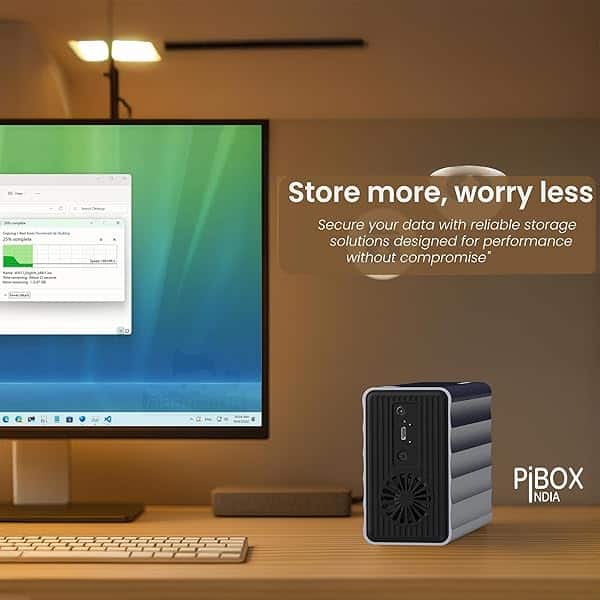
Professional Dual-Bay RAID Storage Solution
Transform your SATA drives into enterprise-grade external storage
🎯 4 Intelligent RAID Modes
- JBOD: Independent drives for maximum flexibility
- RAID 0: Striping for 2X speed performance
- RAID 1: Mirror mode for complete data protection
- CLONE: One-touch backup solution
✓ Hardware DIP switches – No software required
💾 Massive Storage Capacity
- Supports up to 56TB total (2×28TB)
- Compatible with 3.5″ SATA HDDs
- Compatible with 2.5″ SATA HDDs/SSDs
- Mixed drive sizes supported
✓ Hot-swappable drives with tool-free installation
⚡ Professional Performance
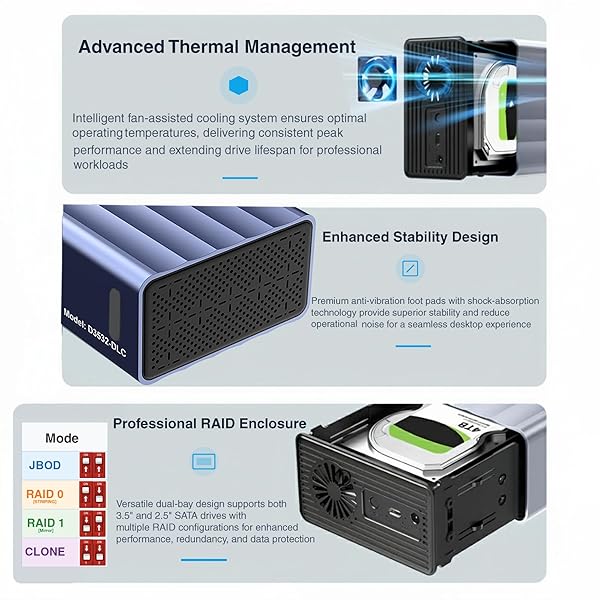
Powered by genuine REALTEK RTL9201RDP chipset delivering true USB 3.1 Gen 1 speeds up to 6Gbps. With UASP support, achieve 70% faster transfers than traditional USB 3.0 – perfect for 4K video editing, large database operations, and continuous backup workflows. The integrated cooling fan with intelligent temperature control ensures sustained peak performance during 24/7 operations.
🛡️ Premium Industrial Design
Constructed from 325g+ heavy-duty aluminum alloy with precision-machined cooling fins for superior heat dissipation. The robust metal chassis provides excellent EMI shielding and physical protection. Anti-vibration silicone foot pads ensure desktop stability and reduce operational noise, making it perfect for professional studios and quiet office environments.
📦 Complete Professional Package
✓ USB 3.1 Type-C cable
✓ 12V power adapter
✓ User manual
✓ Mode switching guide
✓ 1-year warranty
🔩 Premium Installation Hardware Included

High-quality mounting screws included for secure drive installation. The kit contains all necessary hardware for both 3.5″ and 2.5″ drives, ensuring proper mounting and optimal vibration dampening. No additional hardware purchase required – everything you need is in the box for professional installation.

⚠️ IMPORTANT: RAID 0 and RAID 1 modes will format drives – backup all data before switching modes. JBOD mode preserves existing data. Connect to PC/MAC and press RESET buttton for 15 seconds on desired mode to activate the mode.
📚 Complete RAID Mode Guide & Configuration
💿 JBOD Mode (Just a Bunch of Disks) – Independent Storage
DIP Switch Configuration:
SW1: ON | SW2: ON
Capacity Formula:
Drive 1 + Drive 2 = Independent
JBOD presents each drive as a separate volume to your operating system. This is the factory default mode and the safest for existing data. Each drive maintains its own file system, partitions, and data integrity. You can use different file systems (NTFS, exFAT, HFS+) on each drive simultaneously.
Ideal Use Cases:
- Separate OS and data drives
- Different backup destinations
- Mixed media storage (videos on one, photos on another)
- Testing different drive configurations
⚡ RAID 0 Mode (Stri
ping) – Performance Maximization
DIP Switch Configuration:
SW1: ON | SW2: OFF
Capacity Formula:
(Smallest Drive × 2) = Total
RAID 0 stripes data across both drives, effectively doubling read/write performance. Data blocks are alternately written to each drive, allowing simultaneous operations. This mode provides maximum speed and full capacity utilization but offers zero redundancy.
Performance Benefits:
- Up to 2X faster sequential read/write speeds
- Excellent for large file transfers (4K video, RAW photos)
- Reduced bottlenecks in data-intensive applications
- Full combined capacity of both drives
⚠️ CRITICAL RISK:
Complete data loss if either drive fails. No recovery possible. Use only for temporary/cached data or ensure regular backups to separate storage.

🛡️ RAID 1
Mode (Mirroring) – Data Protection Priority
DIP Switch Configuration:
SW1: OFF | SW2: ON
Capacity Formula:
Smallest Drive = Total Capacity
RAID 1 creates an exact mirror of your data on both drives simultaneously. Every write operation is duplicated, ensuring complete redundancy. If one drive fails, the system continues operating normally with the surviving drive, preventing data loss and downtime.
Protection Benefits:
- Complete data redundancy – survives single drive failure
- Automatic failover – no downtime if drive fails
- Read performance improvement (parallel reads)
- Peace of mind for irreplaceable data
⚠️ HARDWARE LIMITATION:
This enclosure lacks dedicated RAID controller with CPU/memory. Therefore, it does NOT support automatic RAID rebuild. After replacing a failed drive, you must manually reinitialize RAID 1, which will format both drives. Always maintain external backups.
📋 COPY/Clone Mode – On-Demand Duplication
DIP Switch Configuration:
SW1: OFF | SW2: OFF
Clone Direction:
HDD2 (Source) → HDD1 (Target)
Clone mode enables offline drive duplication without computer connection. Perfect for creating exact drive copies, system migrations, or backup drives. The cloning process copies every sector, including boot records, partitions, and all data.
Cloning Applications:
- Upgrade to larger drive without reinstalling OS
- Create exact backup before major updates
- Duplicate drives for multiple systems
- Forensic drive imaging
📝 Cloning Procedure:
- Install source drive in Slot 2 (HDD2)
- Install target drive in Slot 1 (HDD1)
- Set both DIP switches to OFF
- Power on the enclosure
- Press and hold Reset button for 5 seconds
- LED indicators will show cloning progress
- Do not disconnect until completion
🔄 RAID Mode Switching Procedure
Step-by-Step Mode Change Instructions:
⛔ STOP! BACKUP ALL DATA FIRST!
Switching to RAID 0 or RAID 1 will PERMANENTLY ERASE all data on BOTH drives
- Backup all important data from both drives to external storage
- Safely eject drives from your operating system
- Power OFF the enclosure using the power switch
- Adjust DIP switches to match your desired RAID mode configuration
- Power ON the enclosure
- For RAID 0 or RAID 1 ONLY:
- Press and HOLD the Reset button
- Count slowly to 15 seconds (use a timer)
- Release the button
- Wait for drive initialization (LED activity)
- Connect to computer via USB cable
- Format the new volume in Disk Management (Windows) or Disk Utility (Mac)
✅ Note: JBOD and Clone modes do NOT require the 15-second reset and will NOT erase existing data when switching from other modes.
🔧 Troubleshooting & Solutions
❌ Drives Not Detected or Not Showing Up
Check Hardware:
- Verify 12V power adapter is connected and LED is on
- Try different USB ports (USB 3.0/3.1 preferred)
- Test with included USB-C and USB-A cables
- Ensure drives are fully seated with screws tightened
- Check drive compatibility (SATA I/II/III only)
Check Software:
- Open Disk Management (Windows) or Disk Utility (Mac)
- Look for uninitialized or unformatted drives
- Update USB controller drivers
- Disable USB selective suspend in Power Options
- Try drives individually in JBOD mode first
🐌 Slow Transfer Speeds or Poor Performance
Diagnostic Steps:
- Verify USB 3.0/3.1 connection: USB 2.0 ports limit speed to 480Mbps
- Enable UASP: Check Device Manager for “USB Attached SCSI (UAS)”
- Monitor temperature: Ensure cooling fan is running, check for overheating
- Test individual drives: One slow drive affects RAID performance
- Check drive health: Run CrystalDiskInfo or similar S.M.A.R.T. tool
- Optimize settings: Disable Windows write-cache buffer flushing
- Cable quality: Use only the included high-quality cables
⚙️ RAID Mode Not Working Correctly
| Issue | Solution |
|---|---|
| RAID not initializing | Hold Reset for full 15 seconds, not less |
| Wrong capacity showing | RAID 1 uses smallest drive size, RAID 0 uses 2× smallest |
| LEDs flashing incorrectly | Power cycle completely, verify DIP switch positions |
| Clone failing | Target must be ≥ source capacity, 5-second press only |
| Lost data after mode change | Data cannot be recovered – always backup first |
🌡️ Overheating or Excessive Noise
- Fan not running: Check power connection, fan may be temperature-controlled
- Excessive heat: Ensure adequate ventilation, don’t stack devices on top
- Vibration noise: Tighten all screws, ensure rubber feet are attached
- Fan noise: Normal during heavy use, clean dust from vents regularly
- Drive clicking: May indicate failing drive, backup immediately and test individually
💡 LED Indicator Reference Guide
| LED Status | Meaning | Action Required |
|---|---|---|
| Power LED – Solid Blue | Unit powered on and ready | None – Normal operation |
| HDD1 LED – Blinking | Drive 1 activity (read/write) | None – Data transfer in progress |
| HDD2 LED – Blinking | Drive 2 activity (read/write) | None – Data transfer in progress |
| Both HDDs – Fast Blinking | RAID initialization or cloning | Wait for completion |
| LEDs Off (Power On) | Drive not detected or failed | Check drive connection/health |
🛠️ Maintenance & Best Practices
Regular Maintenance
- Clean air vents monthly with compressed air
- Check all cable connections quarterly
- Monitor drive health with S.M.A.R.T. tools
- Keep firmware/drivers updated
- Maintain 20% free space on drives
Optimal Usage Tips
- Place on flat, vibration-free surface
- Ensure 2-inch clearance around vents
- Use UPS for power protection
- Safely eject before disconnecting
- Avoid moving during operation
Data Safety Rules
- Always maintain external backups
- Test RAID configuration before production use
- Document your RAID setup
- Never rely solely on RAID for backup
- Replace drives at first sign of failure
⚠️ CRITICAL INFORMATION – READ BEFORE USE
🔴 Data Loss Warnings
- Switching to RAID 0 or RAID 1 = Complete data erasure on BOTH drives
- 15-second Reset in RAID modes = Immediate formatting begins
- RAID 0 failure = 100% data loss, no recovery possible
- Clone operation overwrites target drive completely
🔴 Hardware Limitations
- NO automatic RAID rebuild capability (no dedicated CPU/memory)
- RAID 1 drive replacement requires complete reinitialization
- Cannot expand existing RAID arrays
- Cannot convert between RAID levels without data loss
🔴 Before Every Mode Change
- Backup ALL data to separate storage
- Verify backup integrity
- Document current configuration
- Understand that data recovery is impossible after formatting
RAID IS NOT A BACKUP SOLUTION – ALWAYS MAINTAIN SEPARATE BACKUPS
📞 Technical Support & Warranty
For technical support, warranty claims, or additional guidance, contact PiBOX India support. Register your product for warranty coverage and access to firmware updates. Keep your purchase invoice for warranty service. Professional installation support available for enterprise customers.
| Weight | 0.9 lbs |
|---|---|
| Dimensions | 9.4 × 12.8 × 30 in |
Related products
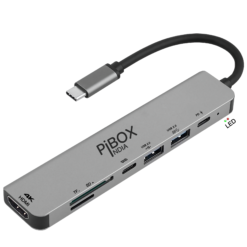
USB Hubs and Adaptors